Step by Step Custom Sizing Guide for Women's Perfect Fit
TL;DR:
- Accurate body measurements are essential for creating well-fitting custom clothing and footwear, requiring proper tools and techniques.
- Consistently record, update, and verify measurements, especially the crucial extra length for floor-length styles, to ensure optimal fit.
Accurate body measurements are the single most reliable path to custom clothing and footwear that fits your exact shape. A step by step custom sizing guide removes the guesswork from ordering made-to-measure pieces, whether you are shopping for a wedding gown, a concert outfit, a special occasion dress, or custom boots. The process, known in the industry as bespoke measurement taking, requires a soft cloth tape, good posture, and ideally a second pair of hands. Primadonsanddonnas builds every made-to-order piece from your submitted numbers, so getting those numbers right is the foundation of everything.
What tools do you need before starting your custom measurements?
Preparation determines accuracy before you take a single measurement. Arriving at this step without the right tools produces numbers that are off by enough to affect the final garment.
What you need:
- A soft, flexible cloth measuring tape (not a metal hardware tape)
- A full-length mirror or a level surface to check tape alignment
- A trusted assistant for back and shoulder measurements
- Fitted undergarments or the bra you plan to wear with the finished piece
- A notebook, phone, or printable measurement card to record results
Measuring with intended undergarments is non-negotiable for torso accuracy. A push-up bra adds volume; a sports bra compresses. The garment is built around whichever you measure in, so choose deliberately.
Posture matters just as much as tools. Stand upright with your weight evenly distributed, arms relaxed at your sides, and feet together. Avoid locking your knees or tilting your hips. Measuring at the same time of day reduces variability. The Surrey Cardiovascular Clinic recommends first thing in the morning, before food or drink, for the most consistent waist readings. That consistency carries over to every other measurement.
Pro Tip: Wear a fitted tank top or leotard during the session. It keeps the tape from catching on fabric while giving you a clear view of your body’s natural contours.
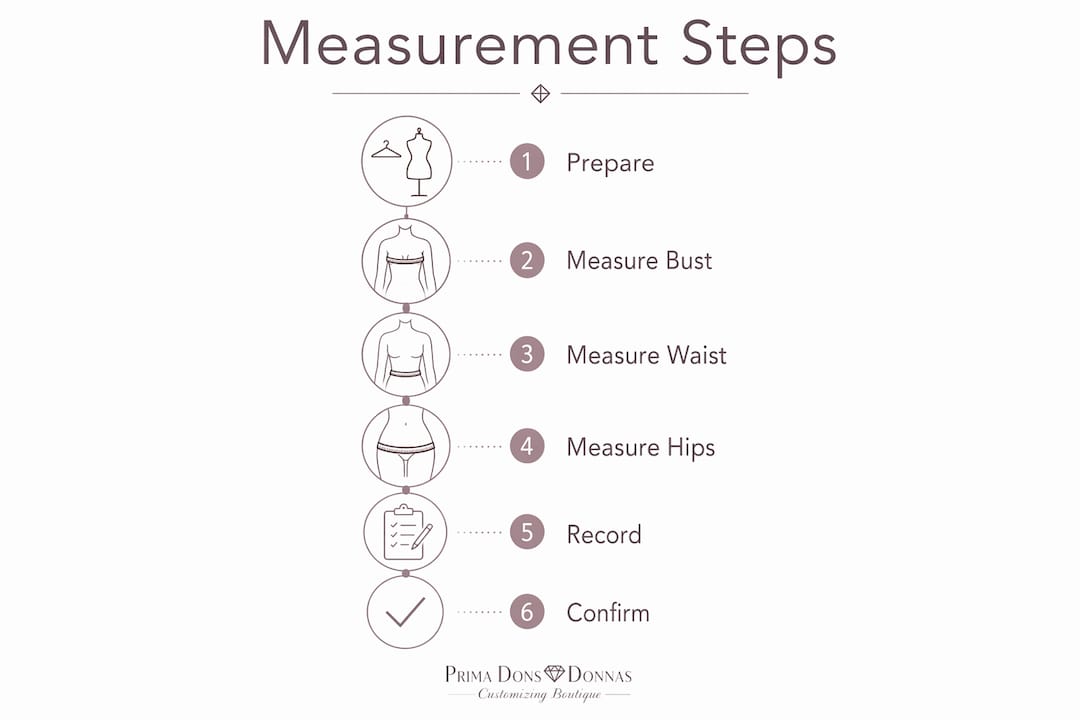
Step by step sizing guide: how to measure every key area
This is the core of your custom sizing instructions. Work through each measurement in order and record every number immediately. Do not rely on memory.
Clothing measurements
- Neck. Wrap the tape around the base of your neck where a collar would sit. Keep one finger between the tape and your skin for comfort. Record in inches.
- Shoulder width. Have your assistant measure from the tip of one shoulder (the acromion bone) straight across to the tip of the other. This is a back measurement taken horizontally.
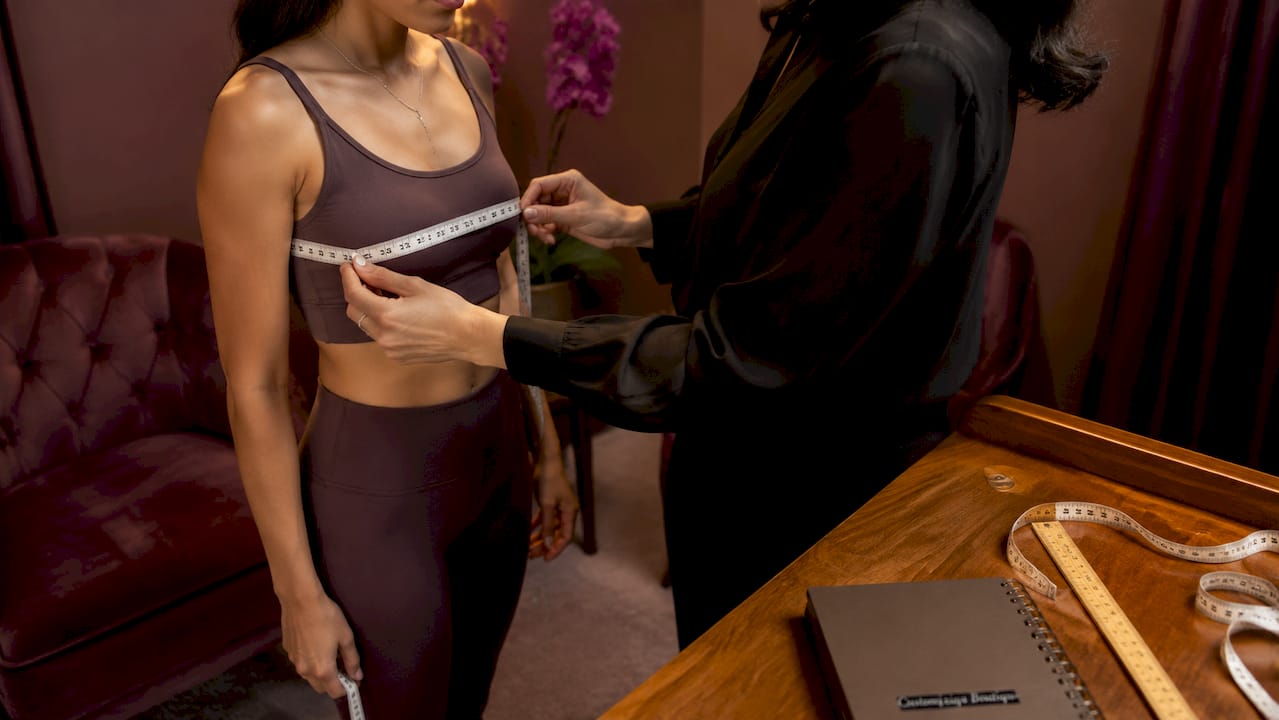
- Bust. Wrap the tape around the fullest part of your chest, keeping it completely horizontal all the way around. Take the reading at the end of a normal exhale without pulling in.
- Underbust. Measure directly under the bust where a bra band sits. This number is used for structured bodices and corset-style pieces.
- Waist. Measure at your natural waist, which is the narrowest point of your torso, typically one inch above your navel. Do not suck in.
- Hips. Stand with feet together and measure around the fullest part of your hips and seat, usually 7 to 9 inches below the natural waist.
- Arm length. Bend your elbow slightly and measure from the shoulder tip down to the wrist bone. This gives sleeve length for jackets and long-sleeved dresses.
- Thigh and calf. For fitted pants or thigh-high boots, measure the fullest part of the thigh and the fullest part of the calf separately.
- Height. Stand barefoot against a wall and mark the top of your head. Measure from floor to mark.
- Extra length for floor-length styles. Floor-length dresses require an additional measurement from your natural waist to the floor while wearing the heel height you plan to use. Azazie’s measurement guide includes this as a dedicated field, and Primadonsanddonnas uses it the same way for gowns and maxi styles.
Footwear measurements
| Measurement | How to take it | Why it matters |
|---|---|---|
| Foot length | Trace foot on paper, measure heel to longest toe | Sets the base size for the boot or shoe |
| Foot width | Measure across the widest part of the foot | Prevents pinching at the ball of the foot |
| Calf circumference | Measure fullest part of calf | Critical for thigh-high and knee-high boots |
| Ankle circumference | Measure just above the ankle bone | Determines shaft entry width |
| Instep height | Measure over the top of the foot arch | Affects zip and pull-on fit |
Pro Tip: Trace both feet. Most people have one foot slightly larger than the other. Always size to the larger foot.
Using anatomical landmarks such as the acromion for shoulders and the iliac crest for hips prevents guesswork and makes your measurements repeatable across future orders.
What mistakes cause poor fit when measuring?
The most common errors in the size measurement process are not about forgetting a measurement. They are about technique. Inconsistent tape tension, parallax errors, and measuring over bulky clothing are the three leading causes of garments that arrive and do not fit correctly.
Mistakes to avoid:
- Pulling the tape too tight. This compresses soft tissue and produces a number smaller than your actual circumference. The tape should lie flat without indenting the skin.
- Leaving slack in the tape. Too loose adds false inches. The tape should be snug, not tight.
- Tape sag or tilt. A tape that dips at the back reads larger than the true circumference. Your assistant should confirm the tape is level all the way around.
- Measuring over a thick sweater or jeans. Measuring over bulky clothing adds up to two inches of false volume. Always measure over fitted undergarments or the base layer you plan to wear.
- Parallax reading error. Reading the tape at an angle rather than straight on creates an optical illusion that shifts the number. Look directly at the tape at eye level. This is a frequently overlooked source of millimeter-level inaccuracy.
- Skipping a reference garment check. If you own a well-fitting dress or jacket, measure it flat and compare those numbers to your body measurements. Discrepancies larger than half an inch signal a technique issue worth correcting before you submit your order.
Having an assistant handle back and shoulder measurements is not optional for accuracy. An assistant and cloth tape are the standard recommendation from brands like Azazie and Sumissura for exactly this reason. You cannot hold a tape level across your own back.
How to store and use your measurements for future orders
One accurate measurement session should serve you for multiple orders. The key is documentation and knowing when to update.
Best ways to record and maintain your measurements:
- Write them on a printed measurement card and keep it in your closet or with your fashion receipts
- Save them in a notes app on your phone with the date of measurement
- Use a dedicated tool like Arklavo’s measurement app, which launched an updated version in April 2026 and keeps your numbers organized for reorders
- Create a simple spreadsheet with columns for measurement name, value, and date taken
Consistent documentation improves fit reliability across every future order. When you submit the same numbers to Primadonsanddonnas for a second dress, the team builds from a known baseline rather than starting from scratch.
Update your measurements after any significant body change. Weight loss or gain of more than 10 pounds, pregnancy, or a change in fitness routine all shift key circumferences. A good rule: re-measure every six months if you are actively changing, or once a year for maintenance.
When communicating measurements to a brand or tailor, send every number even if you think some are not relevant. A floor-length gown needs your height and extra-length measurement. A structured jacket needs your underbust. Sending complete numbers prevents back-and-forth delays and speeds up production.
Pro Tip: When ordering from Primadonsanddonnas, include a note about your preferred fit style. Fitted through the hip, relaxed through the waist, or extra room in the calf for boots. Numbers tell the team your size; notes tell them how you like to wear it.
Key takeaways
Precise measurements taken with a cloth tape, proper posture, and an assistant are the foundation of every well-fitting custom garment or boot.
| Point | Details |
|---|---|
| Tools first | Use a soft cloth tape, fitted undergarments, and an assistant before you start. |
| Measure in order | Work from neck to foot, recording each number immediately after taking it. |
| Avoid the top three errors | Inconsistent tape tension, parallax reading, and measuring over bulky clothing cause the most fit failures. |
| Document and date | Save measurements with the date taken and update after any significant body change. |
| Extra length matters | Floor-length styles need a waist-to-floor measurement taken in your intended heel height. |
Why I think most women skip the most important measurement
By Latoya
After working with custom fashion for years, the measurement I see skipped most often is extra length for floor-length styles. Women measure bust, waist, hips, and then stop. They assume height covers it. It does not. The extra length field accounts for your heel height, your posture, and the exact floor clearance you want. Skip it and a gown that should graze the floor pools at your feet or sits two inches too short.
The other thing I have learned: measuring is not a one-time event. Your body changes. Confidence in your measurements comes from re-measuring regularly, not from memorizing a number you took three years ago. I have seen women order a second dress using old measurements and wonder why the fit felt off. The dress was built correctly. The measurements were outdated.
Custom sizing is also one of the most sustainable choices you can make in fashion. A garment built to your exact body lasts longer because it fits correctly from day one. You are not stretching seams or altering hems. That is the real value of taking this process seriously. It is not just about looking good at one event. It is about building a wardrobe that works for your actual body, not a size chart someone else designed.
Fashion as self-expression starts with fit. When a piece fits the way it was designed to fit, you carry it differently. That confidence is not a bonus. It is the whole point.
— Latoya
Shop custom made-to-order styles at Primadonsanddonnas
You have the measurements. Now put them to work. Primadonsanddonnas builds every piece to your exact numbers, from custom made-to-order dresses for weddings, concerts, and special occasions to plus-size styles designed with bold, confident fit in mind. The collection includes floor-length gowns, structured bodices, and statement pieces in any color you choose. For footwear, the custom boots collection covers thigh-high and knee-high styles sized to your calf and ankle measurements. Need something fast? Ready-to-ship options are available for quick delivery. Use your personalized sizing chart alongside your measurements to place your order with confidence.
FAQ
What is a step by step custom sizing guide?
A step by step custom sizing guide is a structured process for taking body measurements in a set order using a soft cloth tape, starting from the neck and working down to the feet, then recording each number for use in a made-to-order garment or footwear order.
How many measurements do I need for a custom dress?
Most custom dresses require 8 to 10 measurements including bust, underbust, waist, hips, shoulder width, height, and extra length for floor-length styles. Structured or sleeved styles may also need arm length and neck circumference.
Do I need an assistant to measure myself?
An assistant is strongly recommended for shoulder width and back measurements. Brands like Azazie and Sumissura both specify that an assistant with a cloth tape produces the most accurate results for custom apparel orders.
How often should I update my custom measurements?
Update your measurements every six months if your body is actively changing, or at minimum once a year. Any weight change of 10 or more pounds, pregnancy, or a significant shift in fitness routine warrants a fresh measurement session.
Why does my custom garment not fit even with measurements?
The most common causes are tape tension inconsistency, parallax reading error, and measuring over bulky clothing. Cross-check your numbers against a well-fitting reference garment and confirm the tape was level and snug, not tight, during each reading.


Leave a comment